# Joining a network
You have received a configuration file for a WirtBot network?
Follow the guide for your the operating system you use to join it.
# Linux
First install Wireguard:
- Debian:
sudo apt-get install wireguard wireguard-tools - Arch Linux:
sudo pacman -S wireguard-tools
Now copy the config that you downloaded to /etc/wireguard. You will need sudo for this operation, as the /etc/wireguard directory is protected.
To test things out run sudo wg-quick@DeviceName. wg-quick will automatically check the /etc/wireguard directory for the correct config, in this cast DeviceName.conf.
The connection should be established. You can check this with sudo wg.
# Making the connection permanent
If you want to stay connected you can enable this via systemctl.
Typing sudo systemctl enabled --now wg-quick@DeviceName will start a system service that will establish the connection on every reboot - if your system is using SystemD.
# Windows
First download the WireGuard® software from https://wireguard.com (opens new window)

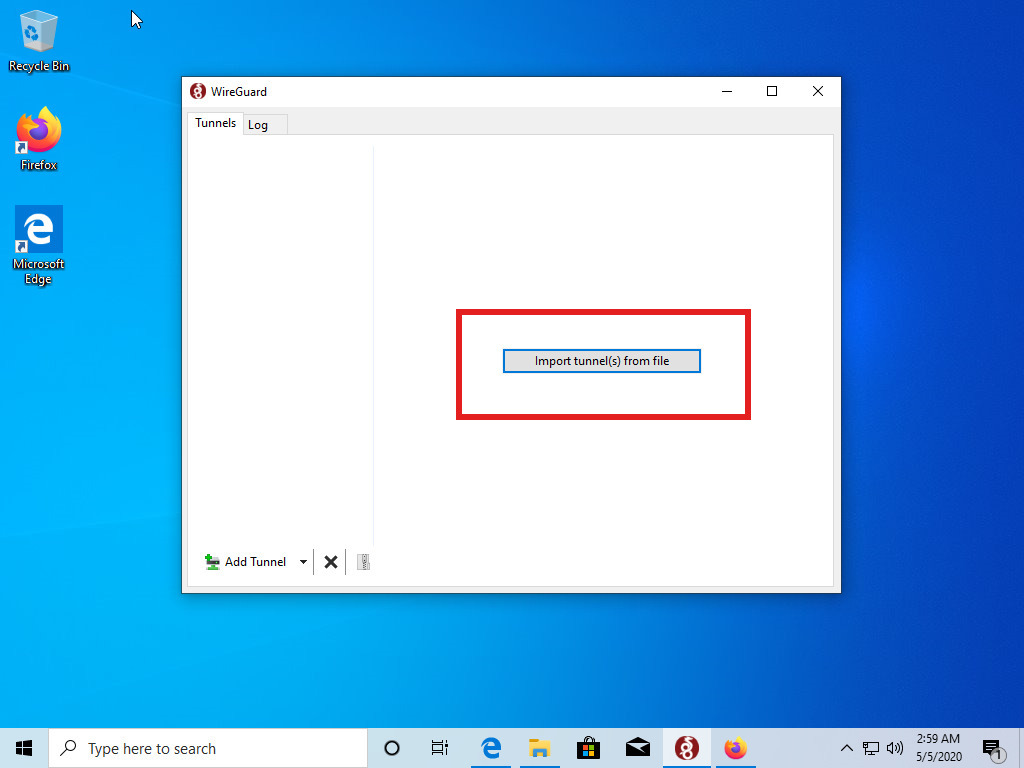
Now click on this button to import your config
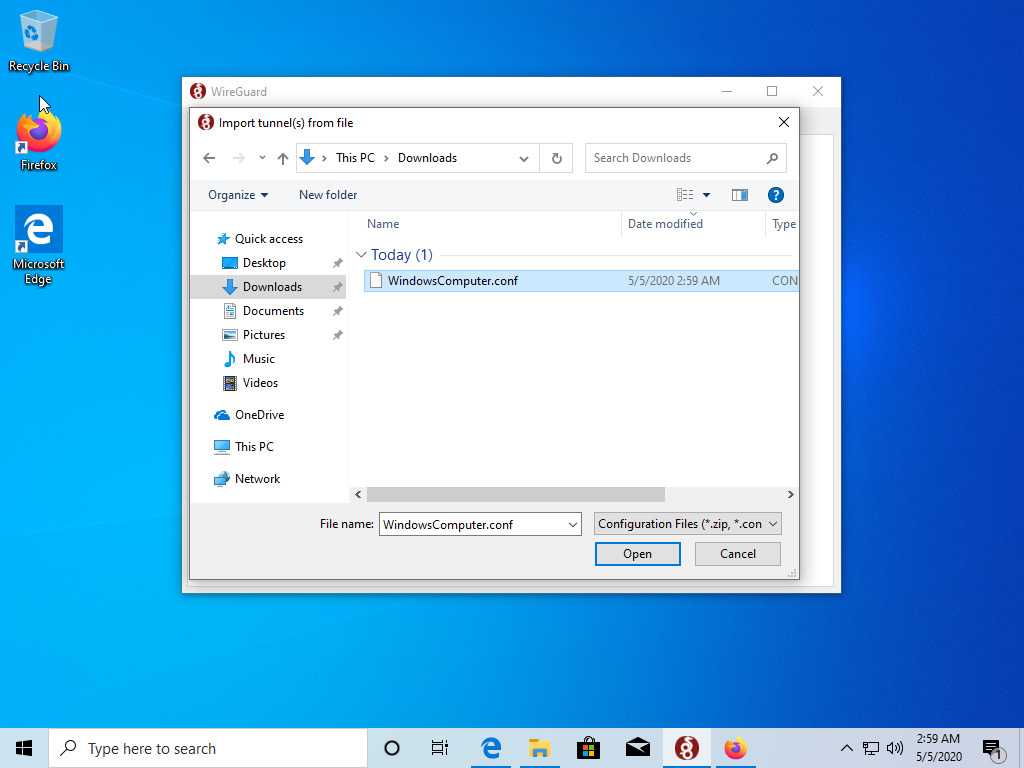
Go to the folder where you downloaded your config file and select it
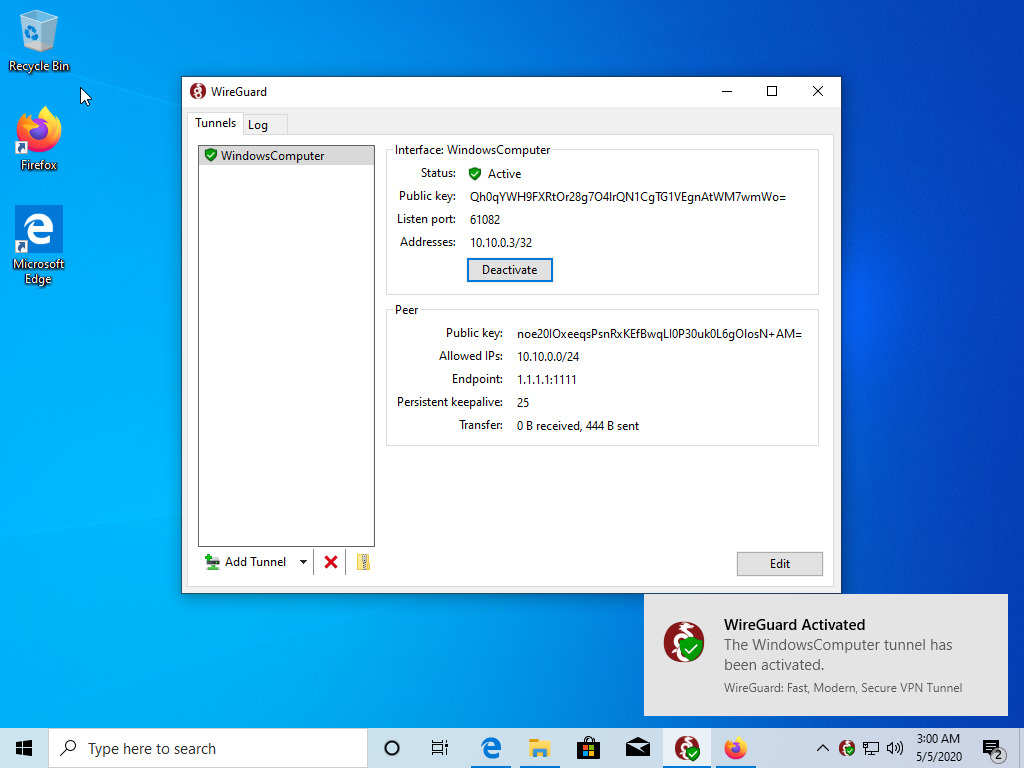
The config is now imported. Click activate to join the network

Congratulations, you are now connected!
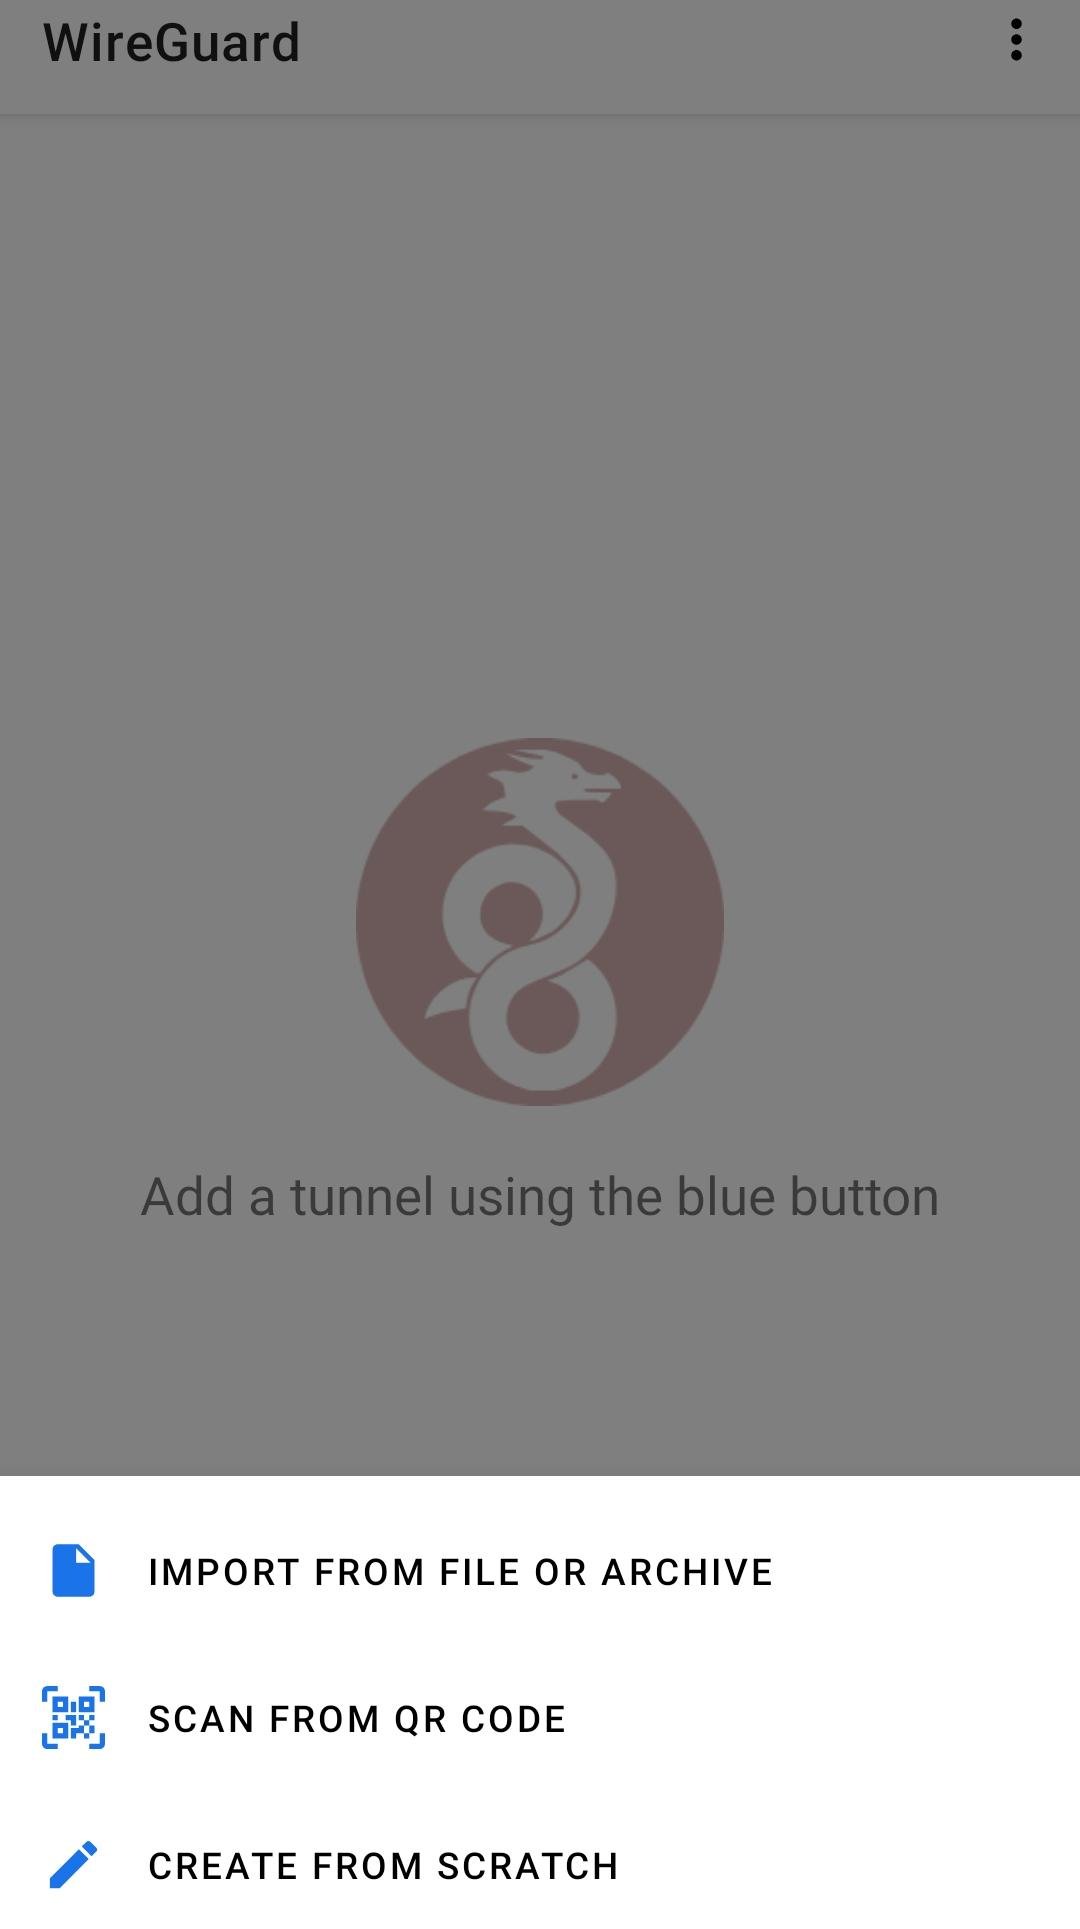
# Android
First install the WireGuard app
Now open it up and click the blue button to add a config

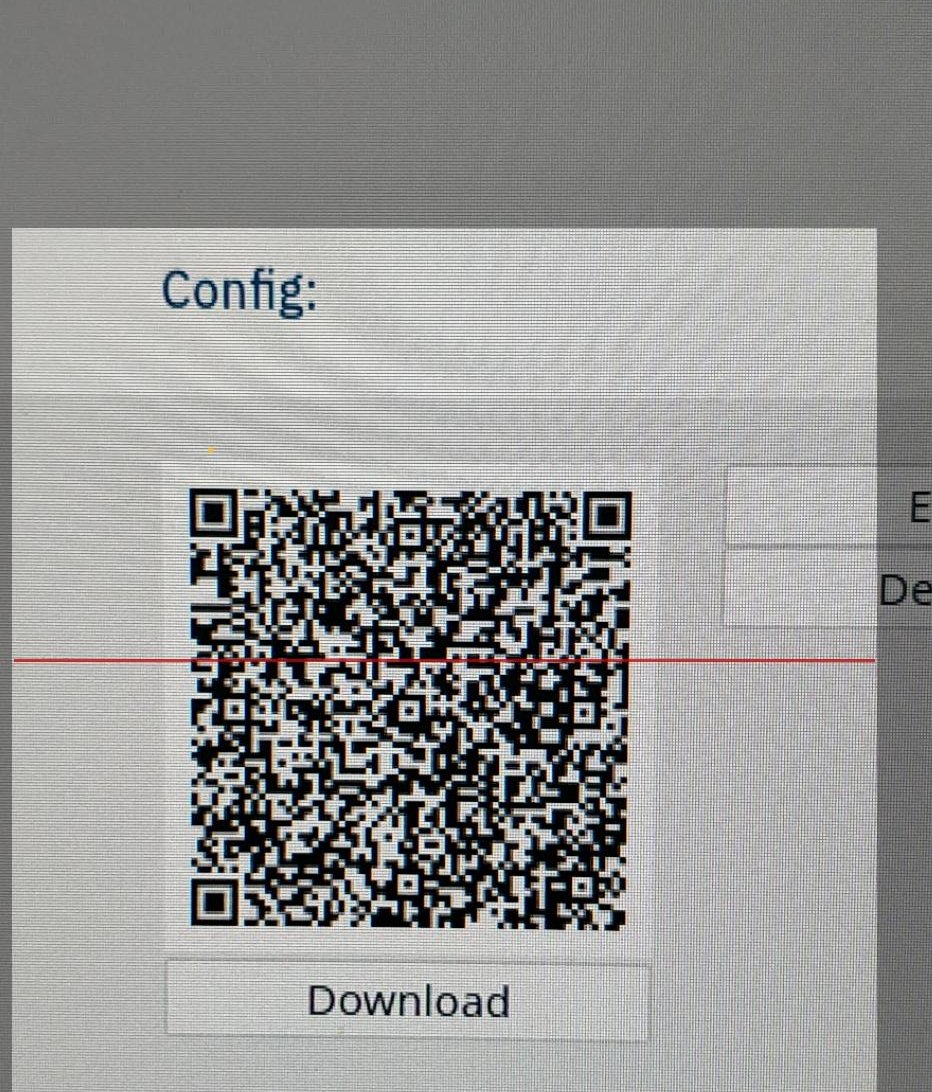
You can choose between different ways to add a config, the easiest way is to simply scan a QR code
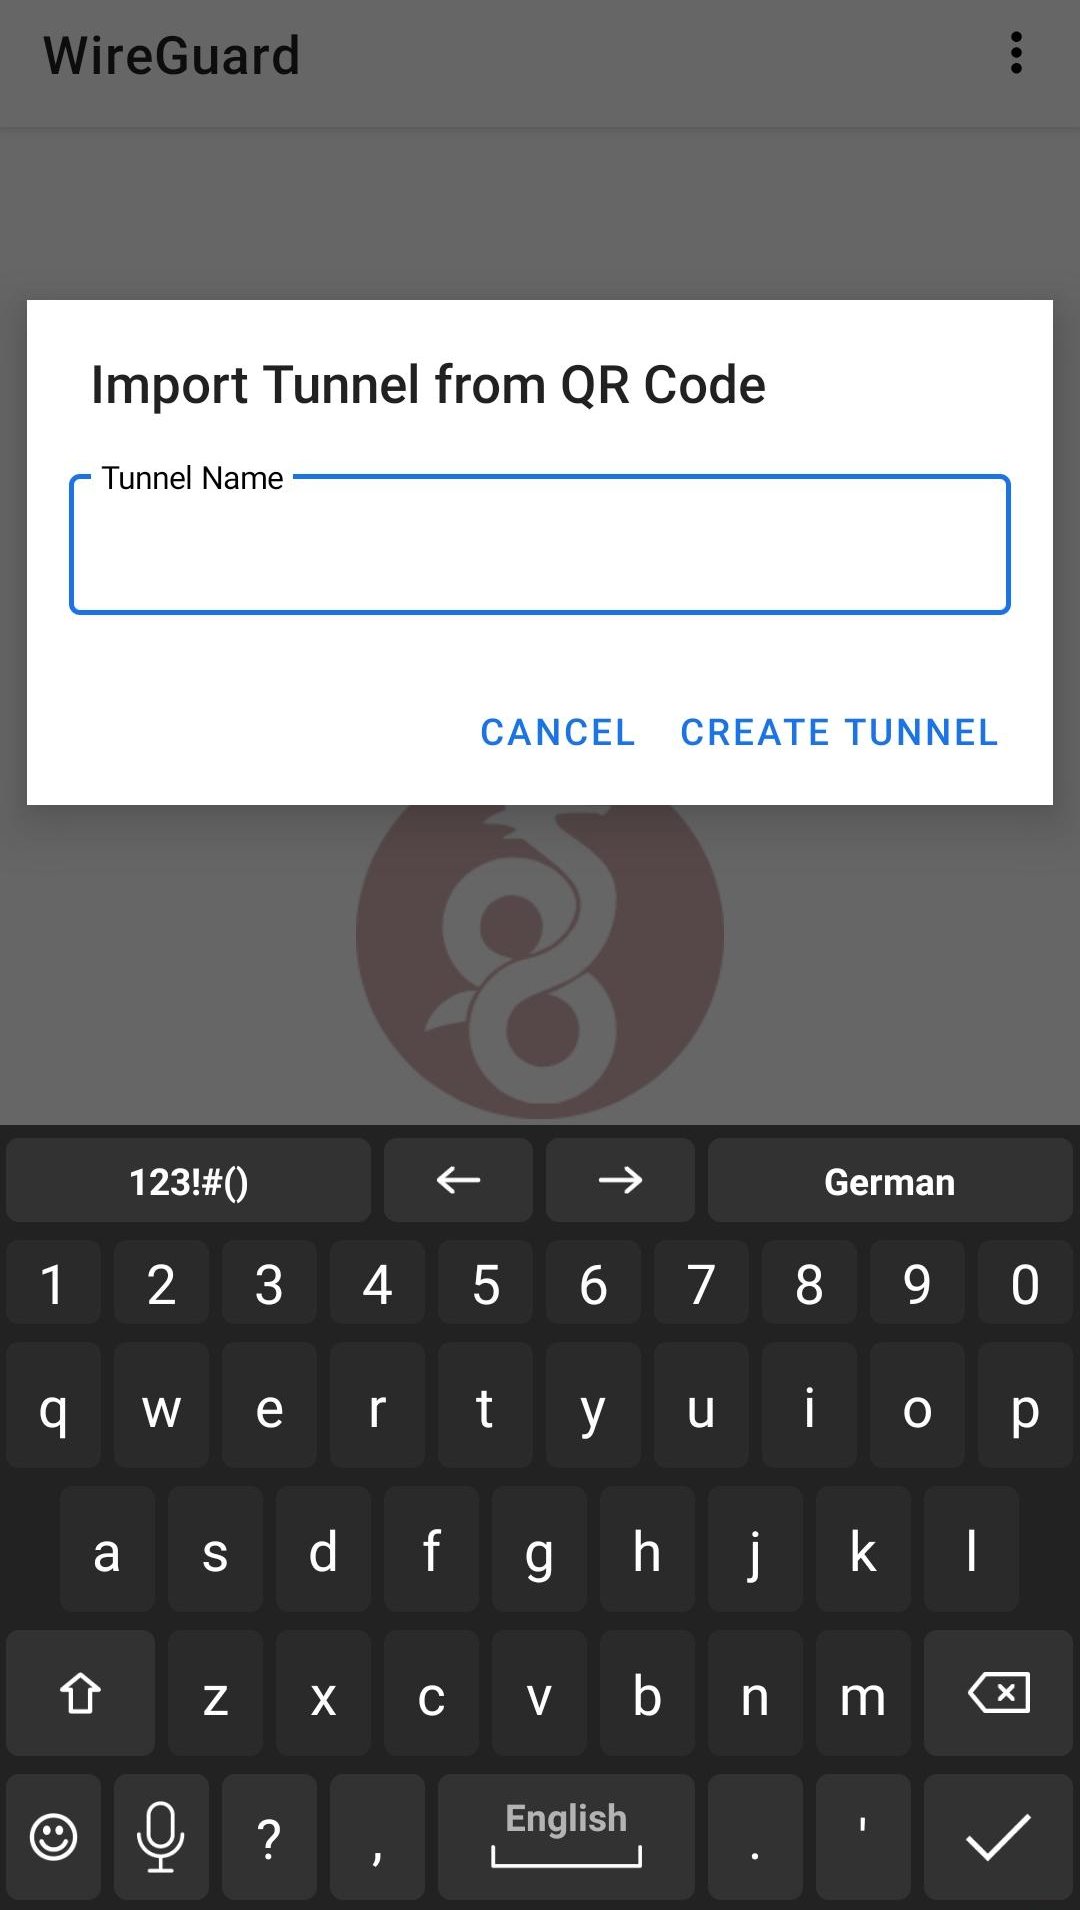
Point your camera at the QR code
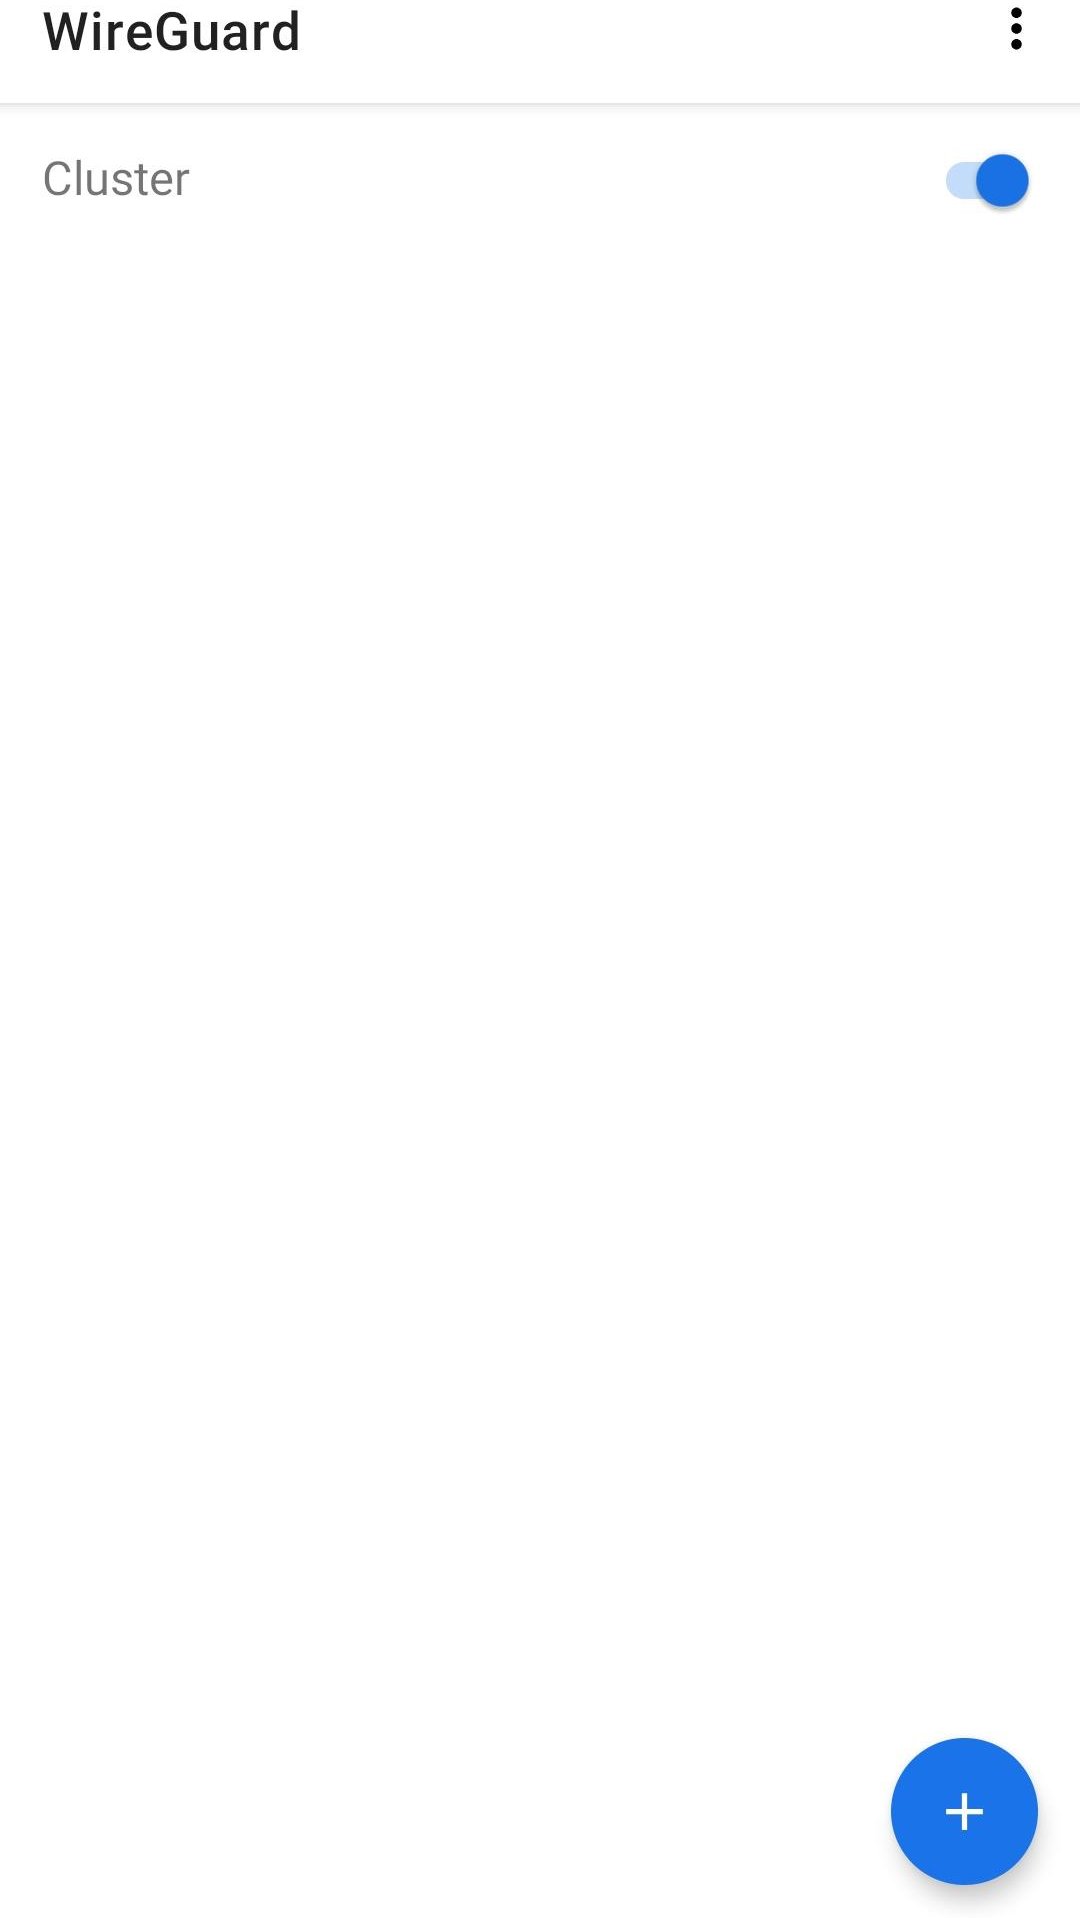
Give a name for the network
Your network is now set up, but not connected. Toggle the switch to get in
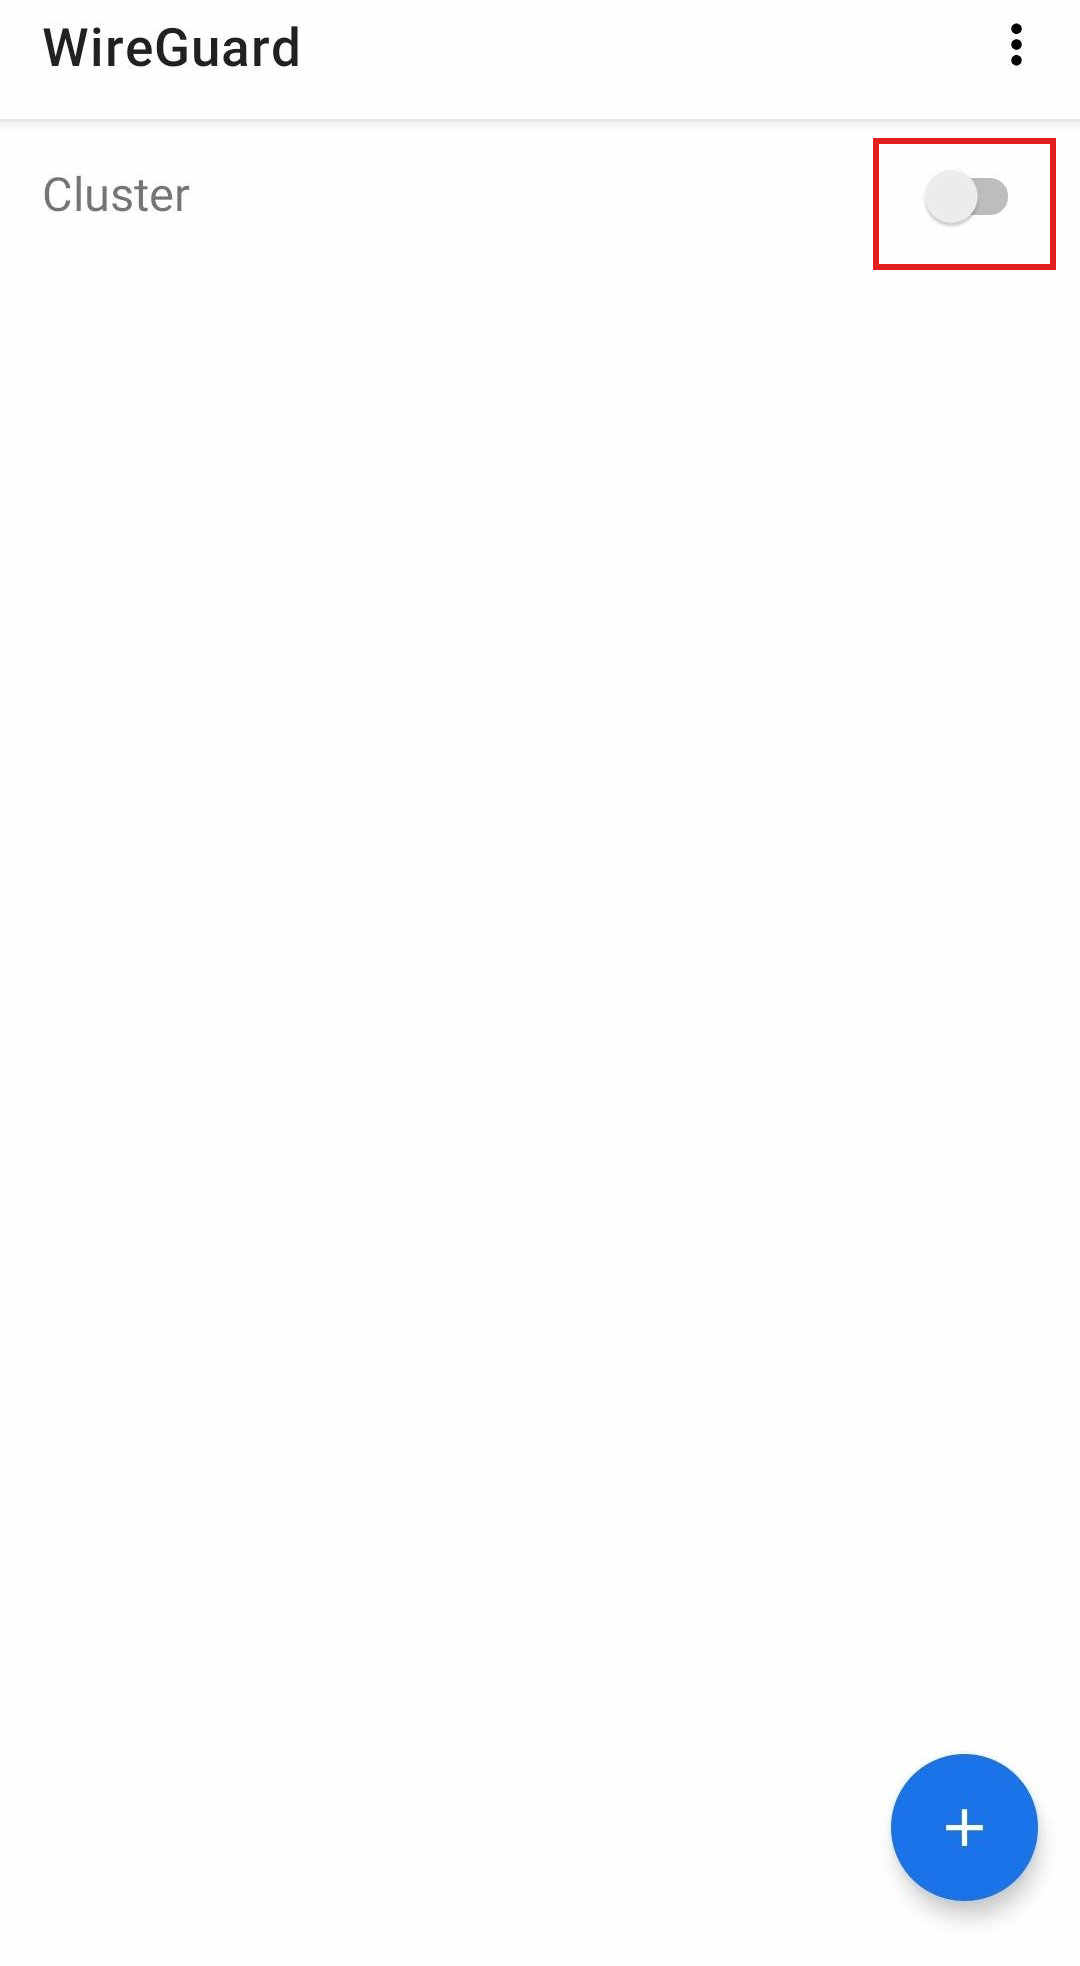
All done! You are now connected to the network
# iOS
- Download Wireguard App from AppStore
- Scan QR code with the app
- Establish the connection
I do not have an iOS device to test this. If you have got a few minutes please be so kind to add a few screenshots via https://github.com/b-m-f/WirtBot (opens new window)
← Setup System Overview →